sound & vision: another new year

Sound_and_vision_january_2015_sewstylist

1. (unknown source) 2. (unknown source)   3. 4. 5.


It’s January again, and by force of habit, or for some deeper reasons, thinking about reinvigorating, becoming, and planning seems to be the thing we’re all doing. Right now, the idea of an open invitation to be what we are appeals deeply to me. Life is most exciting and fulfilling when we embrace ourselves, radiate goodness and give it up freely to others. I’m open to more of that in my life this year. I’m also looking to spend more time around horses, even an afternoon would be an 100% improvement upon the amount of time I spent around horses last year, which was none. There’s something I want to learn from these calm, strong, graceful animals.

On a more concrete note, I’m thinking (a lot, almost obsessively) about sewing jeans. I’m particularly keen on experimenting with 100% cotton, non-stretch denim, as I continue in my pursuit of the perfect modern + vintage denim vibe. I’m also hoping I can make enough time to put together a Rigel Bomber as part of Jacket January. Chances of this happening are mixed because 1. My pattern has yet to arrive. 2. Good things take time.

Here’s some sound to accompany those visions & a few other notes…


If you’ve yet to watch the documentary Advanced Style, do yourself a favor and make time for it before the week is out. Can’t imagine you won’t find as much joy as I did in seeing how at home these women have become in themselves,  and how radically individualized their aesthetics are. Want to be like them when I grow up.

I’ve been washing my face with honey for over a year now. It’s inexpensive, simple, and natural—all of which count for a lot in my book. Thanks to this and Aesop face oil, my skin has never been happier.

The Cut launched a collection of articles this month exploring the planning and pursuit of personal style. The entire Uniforms That Work series is worth a read.

If you’re interested in some off-screen reading, I so enjoyed The Gigantic Beard That Was Evil by Stephen Collins, and not just for The Bangles references. (Yep, the 80’s band!)

This discussion of the difference between Self-Esteem and Self Compassion resonated with me.

Lastly, Madalynne has managed to round-up an incredible list of inspired and inspiring blogs. She’s asking for votes in a run-off for her best blogs of 2015 list. You can discover some delightful new sewing reads and/or vote for me!

yeah, write


sewing machine series by Boston based artist KJ James

In one of those, “Ohmygosh! How did that happen?” moments, I’ve recently realized that mine has become a blog where awesome blog hops come to die. Over the last few months I’ve been flattered to have been tagged by several bloggers asking me to share a bit more about the person and process behind this blog. I’ve had fun thinking about and writing up some (hopefully at least half-interesting) responses to these cool queries, and over the next few weeks I’ll be rolling out my answers. Brace yourselves, friends, for perhaps more than you ever really wanted to know about me!

Morgan, the bright and beautiful author behind Crab&Bee, tagged me to write a little about a subject dear to my heart: Writing! As Morgan wrote in her own blog hop post: “Without being able to reference the original post, I don’t know what the intent of the hop is, but what swayed me to participate was just how much I enjoyed seeing these posts popping up in my reader.” To that I will add that I was equally swayed by the fact that Morgan’s was one of the first blogs I started following back when I was first discovering the online sewing community. I had an immediate appreciation for her style and approach to sewing, and that appreciation has only grown in the years since then.

And as I was pulling together this post, I was tagged a second time by Elizabeth, the brilliant owner and designer behind the most handsome blog + shop + knitting patterns of Hyer Handmade! Thank you, Morgan & Elizabeth, for linking me in to the fun!

Why do I write?

I’m pretty sure I started this blog because I saw everyone else doing it and it looked like fun. I really enjoyed seeing what people had produced, and I learned so much from reading about how they made it happen. I’d been lurking around a variety of blogs for a while, dropping the occasional anonymous comment, when I thought about setting up a space of my own. I was in graduate school at the time, working on a creative writing degree, so I was writing and reading and teaching writing, and writing about readings on writing and writers, and on and on ad-joyful-nauseam. Sewing was the perfect counterpoint to the work I was doing for school. It was nice to have something that came with directions to follow, and to produce something tangible and maybe even useful. (For the record, I do think fiction is tremendously useful as well.)

A blog seemed like the right place to get a little proud about what I was accomplishing and to interact with others who find sewing fun. Plus, writing for a blog is so different from the type of writing I now do for work (commerce driven content) and for myself (realist fiction inspired by writers like Mavis Gallant & Alice Munro). Writing for the blog is the most blatantly fun writing I do because it’s causal, and I’m writing about something real and tangible that I love: Clothes! Sewing! Style! But mostly it’s fun because there are awesome people actually reading and responding to what gets posted. (This small fact never ceases to amaze me.) Only in the last couple months have I started telling the people I know in my non-sewing life about this blog, and a friend of mine recently summed up the experience perfectly when he said, “It sounds like you’re part of a really kind and generous community!” Couldn’t have said it better myself. Whatever my reasons for getting started, the reason I continue has everything to do with the amazing people the blog has connected me to. Yeah, I’m look’n at you!

the reader - yelena bryksenkova

How does my writing process work?

Honestly, I’m still figuring out exactly how I want to write for this blog. Every new post is a bit of an experiment. Typically, it starts with sewing something; then I have to find the time to take pics and do some (very rudimentary) photo editing. I really love how blogging is all about the mix of words and images. When I’m taking pictures, I’ll think about what I want to write, and when I write, I’ll think about which picture might work best with what’s written. There’s a general outline I try to follow for posts: Start with a story, the what and why behind the project. Name the pattern, materials, and general process points. Talk a bit about what I like, love, dislike, and what have you. Open it up to comments. It will vary, but those are the high points I’m usually aiming to hit.

Sewing blogs, unlike a lot of other writing around the web, tends to go long form. Like, very long. (Some of my favorite bloggers standardly draft posts that come in around 1-2K words!) Still, I have it in my head that going much over 500 words at a time is a baaaad idea, so I often find myself sort of just hitting the high points, only to have someone leave a comment asking for the details I left out. I love when that happens! And it’s a great experience, learning more about what people want to read in this way. In a fiction workshop, so often what people want to see or not see in your story is just subjective, and whether you want to apply their suggestions becomes a question of artistic intent. When I’m writing about sewing, I feel bad about leaving out any information someone might have wanted to know or that might help them with their own work. Equally, there’s the feedback one gets from the data each post generates. I certainly don’t write toward the numbers, but it totally fascinates me to observe them and learn what there is to learn from them.

How does [your work] differ from others of its genre?

This is an interesting question, though I’m not sure I have a great answer. Perhaps the thing I love most about reading sewing blogs (you know, in addition to learning just an amazing amount of valuable information) is the inspiration and delight I get from seeing the many creative, brilliant, beautiful approaches other sewers take to their projects. We’re really all of us totally unique in our ways. Still, when I first started sewing, most of what I saw was very feminine with a vintage edge. I loved it! But when I sew that type of garment (and I still do, sometimes, sew things like this) even if I love the garment I don’t tend to wear it much. That’s just not me.

I think my personal style and aesthetic preferences are pretty different from other sewers on the web. If money were no object, I’d swath myself in designs by Rick Owens, Isabel Marant, Martin Margiela, Raquel Allegra, and other sort of edgy, luxurious, modern garb. I don’t see a lot of people sewing that sort of thing. Heck, I don’t really sew much that way myself! But I think I’m striving toward my version of something like that. This is not always easy to remember, like when I was at the fabric store just this weekend, hunting up some cool shirting fabrics for a delightful friend who somehow managed to convince me that I needed a dark purple quilting cotton decorated with chubby black cats. It’s great fabric, but when I got it home I was like, Wait, why do I have 2.5 yards of this???

 What am I working on?

Oh man, too much, always! Over the last year I’ve focused a lot of my energy on reacquainting myself with city living and launching a new career, and so, just as it was in grad school, the blog has had to take a back seat. Still, I do have some fun stuff I’ve been slowly (sooo slowly) working on to evolve this space. On a separate but related note, I’m working on getting my sewing room looking less like a room overflowing with fabric, machines, pattern paper, and thread, and more like a functional (perhaps even beautiful?) workspace. Project wise, this week I’m working on a (late) bday present for one of my best friends.

 Nominations!

I’d like to nominate Amy, of SewAmySew. Her’s is another blog I’ve been reading for a happily long time. She has a a great sense of style, pushing boundaries while still keeping things realistic (read: wearable), and most of what she makes I’d happily steal for myself. And, is it possible no one has yet nominated the ultimate reader + writer + sewcialist + all around amazing woman, Nettie of SownBrooklyn? Well then, don’t mind if I do. No pressure to play along, ladies, but of course we’d all be thrilled if ya did!

And really, I’d be interested to hear from any and everyone what interests and excites you most about sewing+blogging+writing, so please do share your thoughts!

8bc832e80b191a2b697e31f4d6e9cd14

ginger jeans // sewing triumph

Sewing a pair of jeans has been on my Want to Sew list from just about the beginning. I wear jeans no less than 4 days out of every week, and this is one garment where you’re guaranteed to save money constructing them yourself. Because, did know you could spend nearly $500 on jeans?! I mean, they’re gorgeous, but…. That said, I spent over $100 on my last pair of jeans, and it totally seemed worth it at the time. Meanwhile, fabric + notions for these was less than $20. And they might be the best fitting pair of jeans I’ve ever owned. Triumph!

ginger_jeans_sewstylist_18

ginger_jeans_sewstylist_3

The pattern behind these beauties is the latest from Heather at Closet Case Files: The Ginger Jeans. I was a pattern tester, and since Heather has made some adjustments to the sizing since then, I’ll spare you the major details on the sizing + fit. My adjustments were minimal and basically came down to grading between sizes at the waist and hip. The only major change I made was to the leg, which I wanted to be more of a straight leg than was drafted for, and the length, which I cropped. I’m 5’7″ and these were perfectly full length on me before I shortened them.

ginger_jeans_sewstylist_13

ginger_jeans_sewstylist_14

ginger_jeans_sewstylist_25

I used a serger to finish all the inside seams, except on my pocket bags. Those are made of a mid-weight quilting cotton and french seamed.

ginger_jeans_sewstylist_32

ginger_jeans_sewstylist_33

The only places I ran into trouble was on the button hole and the tacks, all of which really stressed out my machine. I suppose with good reason, as there’s at least four layers of denim in there. However, using Heather’s suggestion of putting a wedge under the foot really helped with the tacks. I also added rivets, which was fun. But one of them keeps falling off, so I guess I need to work on my hammering technique!

ginger_jeans_sewstylist_29

ginger_jeans_sewstylist_27

I’ve been wearing these just about non-stop since I made them. I’ve never been more proud of a garment, which anyone who knows me will confirm. I’ve been bragging about these all over the place!

ginger_jeans_sewstylist_9

ginger_jeans_sewstylist_8

Heather is turning out an amazing sewalong right now over on her blog. It’s full of details on where to buy the best fabric and notions, plus everything you need to know to craft your own pair of jeans. Now that it’s done, I thing I was more freaked out than I needed to be about making these. Sure, they were a healthy challenge, but no more than that. And it is weirdly liberating to know I have the ability to make a great fitting pair of handcrafted jeans. So… have I convinced you to give it a try?

ginger_jeans_sewstylist_1

vacation, all I ever wanted

swim_sewstylist.pic5A friend is getting married later this fall, and as part of the lead up to the big day a group of us took off to Palm Springs for a bachelorette celebration! (Unrelated: Should bachelorette parties maybe just be an annual thing, celebrated each year of a ladies ongoing singlehood? It’s just a little disappointing to wait until you’re signing off to celebrate, but I digress…) The lead up to this little vaca provided an awesome opportunity to go into sewing overdrive mode as I attempted to throw together some new Palm Springs appropriate me-mades. I ended up with two dresses and this suit, but I only ended up wearing the suit, partly because the slightly hasty way I threw together the dresses made me feel less confident about them. All those little details that take a piece from “homemade” to “handcrafted” take time, and I was in a weird not wanting to take time kinda mood. In the end, you reap what you sew. (Hah! I’m so fired for that one. )

swim_sewstylist.pic6I put this suit together at the beginning of the week, so finishing on it is pretty good. I’ve had this deep green lycra on hand for a few months now, with plans of making it into some sort of swim thing. It’s a good weight, maybe just a little heavier than average for swimwear, and has just the slightest bit of sheen and a really nice cool, silky hand. I serged the edges and am finally getting a feel for how to use that machine without it chewing up/screwing up everything! I used a double needle to hem the leg openings around an elastic band. I was skeptical about the addition of an elastic band hugging my thighs, but it turned out to be totally comfy and was pretty helpful in keeping the bottom half of the suit where I wanted it.

swim_sewstylist.pic4I lined the bust and between the legs with a plain mesh lining. I probably could have gotten away without any lining at all, but it’s better to be safe than sorry when it comes to wet fabric, so. I was back and forth over which pattern to use because there’s a couple lovely indie options I’d still like to try, but this time around I decided on this vintage pattern I’ve been holding for a bit. There was a little vintage quirk to some of the construction info. For instance, it’s clear stretch fabrics have come far enough by now we no longer require a zipper to get into a fitted bathing suit! And I’m not even going to admit to how much effort I wasted making that silly little neck strap the way they told me to… But all in all, this came together pretty easily.

I really like the details on this suit. The keyhole under the bust is a cute little touch and makes it so you can wear the suit with or without the halter strap. Had to be with on me cause otherwise we were edging into accidental exposure territory. I think the overall bust area was probs a bit too big for me, but all the gathering concealed that nicely. I did find myself fussing with keeping it up a bit more than I would have liked (=not at all). Oddly enough, once the suit was wet it stayed put quite nicely. Go figure. I also really like the low cut hips + full coverage over the rear. Even though the top half was a little fussy, the bottom half was solid, more so than any swimsuit I’ve ever owned. Between this suit and my growing army of Netties, I’m a low cut leg opening convert. Sooo much more comfortable, and cute too.
swim_sewstylist.pic1If I were to change one thing about this suit it’d be to drop the back down for a bit more exposure. Although, given the small trouble I had with keeping things in place up top, I’m pretty sure this suit isn’t properly engineered for that low-back look. Kelly posted a great vintage Stretch & Sew suit on her Instagram feed a month or so back with the sort of rear view that I crave. But in exchange for a low back I got bare shoulders, which I have to say was really nice.

swim_sewstylist.pic7

Here’s a paparazzi pic of me inching my way into the pool. It was insanely hot down there, like over 100 degrees every day, so we basically never left the pool. And get this, one of those brilliant people brought the most awesome little koozies + mini-champage bottles to go in them! As you can see, I took mine everywhere.

experiments in outerwear

When I was eleven, maybe twelve, I was given a quilted jacket for Christmas. It was a seriously beautiful mishmash of gorgeous, silky cotton batiks, but it was also seriously not my style. I so, sooo wanted it to be because it was insanely comfy, just as you’d expect wearing a blanket out in public could be. I tried, but it just wasn’t working, and eventually that lovely jacket found its way into the donations pile. I can’t quite say I’ve been on the lookout for my perfect quilted jacket ever since, but almost!

In the last couple years I’ve seen some beautiful versions of this sometimes classic, sometimes quirky piece popping up here and there on Pinterest. Then I saw this lovely at Sew Over It, and this pretty at Jolies Bobines, and decided I’d try making one myself!

quilted-jacket-sewstylist-Pic1This was a total experiment as I’d never tried quilting of any sort before and had very little idea what I was doing. I spent about five minutes researching some quilting basics, then threw all caution to the wind and dove in. Although there is this lovely pattern available from Republique du Chiffon, I was too impatient to wait for international delivery. Instead I snagged this rad 1980’s number off Etsy:

quiled_jacket_pattern_sewstylist

Along with the jacket I got pants, a tank, and a tank dress! The entire look as pictured is maybe a wee bit much, but I actually think I’ll make up all the pieces in this crazy/delightful outfit eventually. (As a side note, despite prior evidence, I do not have any special thing for rehashing or otherwise trying to bring back the 80’s. It kinda seems like the 80’s is the decade when fashion curled up and died. But then, depending on how you look at em, there are some sewing pattern gems to be had.)

I loved that the Simplicity folks made the sample jacket out of something that looked like silk, so I did the same for mine. I’d bought this silk intending to make Tania culottes, but at home I realized the print had a strong diagonal repeat and probs wouldn’t work for, well, a lot of things. But I think it’s working pretty nicely here.

quilted-jacket-sewstylist-Pic8

I wanted to make this piece warm enough to wear as true outerwear, so I layered some black flannel and some mid-weight cotton batting under my the silk outer-layer. I think the quilters call this a sandwich…? Anyway, I cut out all the pattern pieces individually, in each of the three layers plus once more for the lining. Then I layered everything but the lining together and basted a bit around the edges, plus a few crisscrosses through center, to hold things steady.

Ultimately, all that basting didn’t help me as much as I’d hoped it might. I started quilting in the center of the pattern piece, then quilted out one side, then came back and quilted out the other side. Silk is both a little slippery and a little stretchy by nature, so things shifted a bit as I went, but I’m pretty sure this is the sort flaw only the maker can see. I think I quilted at roughly 1″ intervals, going perpendicular up and down the body pieces, and horizontal across the sleeves. This pattern has raglan sleeves, so I stopped quilting at what would have been the shoulder seam, to help define that area a bit. Of course, I’m telling you all this because, thanks to my very cool printed silk, you can’t actually see much of it.

quilted-jacket-sewstylist-Pic5

This choice to do slightly denser quilting is one change I made from the patten as written. Additionally, I took a few inches off the length so it hits a little below my natural waist (because nobody needs a quilted jacket padding their hips). I also took quite a bit off the sleeves… maybe too much, I don’t know. I wanted my wrists to show, but somehow the sleeves and the body of the jacket ended up on a straight line with one another, though I thought I’d planned to have the sleeves fall an inch or so longer. So, if I make this up again (and to be honest, I don’t know that I will) I’ll go a smidgen longer on the sleeves, which I think would help the proportions.

quilted-jacket-sewstylist-Pic6

All that sandwiching and layering also affected the drape of this little jacket. You can see how it kind of stands off my body. I sort of like it like that… Again, if I give it a second try I might spend more time looking for batting that has a bit more drape.

quilted-jacket-sewstylist-Pic3


quilted-jacket-sewstylist-Pic4

The last pattern adjustment I made was to add some pockets. I added side seam pockets, which I lined with the same cozy black flannel I used inside the jacket. I’m not gonna lie, that flannel lined pocket idea was a good one. Sinking your hands into soft, warm pockets is pretty happy making!

quilted_jacket_sewstylist_pic10


quilted-jacket-sewstylist-Pic9I also added a little interior pocket to the lining, for storing my phone or whatnot. It seems like most men’s outwear has at least one of these interior pockets, but they’re unhappily rare in women’s wear. Do designers assume most ladies don’t care to store things next to their boobs? I dunno, but I’m definitely a fan of the chest pocket (though I did position mine a bit lower than I might have for a gentleman).

quilted-jacket-sewstylist-Pic7Yep, I lined it in silk too. I’m really fortunate to have a solid $10 per yard silk source here in my fair city. And as you can see, I’ve been working on perfecting my welt pocket game; things are coming along nicely! I made all that silk bias binding too. I remember the first time I tried making bias tape, when I was relatively new to sewing. The whole undertaking definitely got the better of me. This time around I took my time with the making, and the applying, and while it’s definitely not perfect (like that part under my fingers may not be fully attached), it was super satisfying to see how my skills had improved with time.

quilted_jacket_sewstylist_pic11Speaking of which, this is my first official piece of me-made outwear! I feel like I’ve totally turned a corner with this one! I’m sure you can relate to feeling like the more you make the more you pretty much just want to wear the things you’ve made, exclusively. Up until recently most of what I’ve made has been of the tops/skirts/dresses variety, which is to say not exactly winter appropriate. Winter is coming (at least in this hemisphere), so I’m glad I’m starting to feel confident in crafting some seasonally appropriate garments!

It’s funny, as I was writing I started to realize that this garment got me over several sewing hurdles (quilting, binding, outwear) and helped me develop some relatively new-to-me skills (sewing with silk, welt pockets). Not to get all rhapsodic about it, but seeing this little, bit by bit development is one of many things that just makes me love sewing. You push yourself, see that you can do it (even if imperfectly) and those little successes inspire you to push yourself a little further next time. Here, more than in other areas in life I think, that kind of development is trackable, recognizable, and of course insanely satisfying. So, do you have some sewing hurdles that you’re warming up to conquer? Or maybe you’re proud of one you just cleared recently?


don’t be so dramatic


anna_dress_sewstylist.pic12That was something my mom used to say when I was just a wee SewStylist. And while I took much of her wisdom and advice to heart, on the subject of clothes I did then and always will have a mind of my own. Which is to say: This dress, it certainly is dramatic.

By Hand London Anna dress @ Sewstylist.wordpress.com
There are so many gorgeous BHL Anna creations swirling around the online sewing universe, it’s hard to remember when my scale tipped from “Wow, that’s really cute…” to “Oh my gosh! I have to have that dress!” Amy’s perfectly fitted vintage floral Anna certainly made me swoon.  As did SallieOh’s gorgeously hand dyed Anna. But really, it was probably one of Rosin’s lovely creations that ultimately pushed me over the edge. Ms. Dolly Clackett must have turned out no less than a dozen incredible versions—like this one, or this one, and THIS ONE—demonstrating not only her awesome creativity, but also the flexibility of this pattern.

By Hand London Anna dress @ Sewstylist.wordpress.comWith visions of many Dolly-esq dresses dancing in my head, I decided to focus on getting the fit of the bodice as close to perfect as possible. And I think (with the helpful hands of my trusty housemate!) I did pretty good. (Uhm, full disclosure, I may not be wearing a bra in these pics, which may have effected the fit at the bust. So, there’s that.)

For my muslin, I used a process very similar to the one Susan Khalje explains in her Craftsy class, The Couture Dress. (I’m full of asides today, so here’s another. That Craftsy class is the greatest. Honestly, sometimes I just watch it for the nerd out pleasure of it. And for the calming effect of Susan’s lovely voice. Nope, not kidding.) Anyway, about the muslin. Basically, you trace your pattern seamlines (not cutting lines) onto muslin, then cut out your pieces with nice big seam allowances so you can make any necessary adjustments. Then, and this is really the part I love, you just use that perfectly fitted muslin as your pattern. People have warned me off this technique, saying you have to worry about the muslin stretching out of shape, etc., etc. But if it’s good enough for Susan Khalje, you know it’s good enough for me.

By Hand London Anna dress @ SewStylist.wordpress.com

I had previously made a very messed up version of this dress, from which I learned what fabric not to use (some mystery synthetic) and that I’d need to apply The Ginger technique for removing back of neckline gaping. That adjustment worked like a charm, and I’m pretty happy with the sway back adjustments I made too! There’s still a little extra fabric back there, but it gets taken up when I sit down. All the seams and darts on this dress make it really accessible, as far as fitting goes. I especially liked that the bodice and skirt were separate, making it really easy to get a good fit at both waist and hips.

By Hand London Ann dress @ SewStylist.wordpress.comI call this the suffering-for-my-art look because I was out on the sidewalk at something like 5:30am taking pictures of myself in an evening dress. And there were dudes, and they were drunk, and they maybe had one full set of teeth between the two of them. And that right there is the problem I have with this dress. Not that it attracts the drunken attention of early morning/late night wanderers per se, but that it really does demand attention. Heather has written about all the wear her Anna’s get all summer long, but try as I might, this is just not the sort of dress I’m comfortable slipping into just any old time for a cruise about town. Why is that? Something about the lovely, yet revealing, nature of the rayon twill I made it up in.  And that slit. And the length. I mean, of course I love this dress. It’s swooshy and lovely and so fun to get all dressed up in, even if I have nowhere to go. It takes me back to a time when I used to dance in the living room to Belinda Carlisle, wearing a towel on my head to simulate the long hair I didn’t have. It was all very dramatic.

My First Mabel

Recently, I’ve found myself thinking about how much sewing has changed my attitude toward clothes and what I feel good wearing. The most obvious difference has been a major shift in my preference for fewer, higher quality clothes in my closet. Gone are the days when I would wander absently into H & M and want to buy all the things. Now, between the poor fit and flimsy fabrics, most of those things look unwearable.

Equally, it makes a lot less sense to settle for something that’s kind of what you want, when you know you have the skills to make exactly what you want. I credit this sewing perk for my expanding interest in skirts and dresses. When shopping ready to wear I typically find them cut too short for my tastes, or that there’s too many details, weird fabric, not enough pockets, etc. etc. etc. With fewer variables to contend with, I just found jeans easier. But (sewing discovery!) skirts and dresses can be waaay more comfortable than jeans when they’ve been made to order for and my me!

colette-mabel-sewstylist-pic1.jpgWord on the street is Colette’s Mabel skirt  is just as comfortable as pjs, yet it looks a whole lot better walking down the street. (Well, maybe not better looking than these.) The rumors are true. This skirt is super comfy, cozy, and easy to wear.

colette-mabel-sewstylist-pic3

I started with the pencil skirt version, then added about four more inches to the length so the skirt could be a bit high-waisted and still hit below my knees. Some might find this length a little dowdy, but it’s what’s most comfortable for me. I like the long line it makes.

I’ve wanted to try this pattern since it came out, and when I was able to get it 20% off (applying the awesome discount I get after my Bay Area Sewists Meetup) I jumped at the chance to give it a go. True, it is a pretty simple pattern, but the time I got to spend sewing instead of drafting was worth it. The fit is good and there’s some thoughtful details. I would not have approached the waistband the same way, and the proportions of the center placket on the pencil skirt are so, so flattering.

colette-mabel-sewstylist-pic4.jpg

The fabric I used is a great mid-weight ponte with a sort of space dyed finish to it. Very cool to look at, but also very difficult to photograph! Nevertheless, it was kind of the perfect fabric for this project. It’s sturdy enough that I don’t have to worry about panty lines, but still stretchy enough that this skirt is a breeze to wear and walk in.

You can almost see in the pics above that I played with the direction of the fabric. The lines go up and down on the front side panels and the two back pieces, but I placed them horizontally across the center placket. This creates nice visual interest and is slimming, not that slimming is my first concern but , hey, can’t hurt!

colette-mabel-sewstylist-pic2.jpg

I cut a straight medium, even though the numbers said I was a small at the waist. As a result, in addition to lengthening the skirt I took about four inches off the waistband, and about a three inch wedge out of center back. The wedge helps accommodate my sway back, and I think I needed more off the waistband because I wanted it to ride a little high. These adjustments were easy to make on the fly, and the whole project was quick and fun to put together.

This skirt is such a basic, wearable shape, and the pattern has tons of possibilities. I definitely plan to return to it. Here’s a few images I pinned to inspire my next Mabel.

collete-mabel-inspiration-collage

One. Two. Three. Four. Five.

I love the idea of taking the #invisiblepajamas aspect of this skirt one step further by making it up in fleece. Also, what if you left off the back vent in favor of a slit up the front? Adding a peplum to this skirt would be super easy and create a totally different look. I definitely plan to make a little black Mabel. And what about that contrasting fabric? Nice, right? If you’d have told me in the years before I started sewing that I’d want an entire wardrobe of jersey skirts I probably would have laughed accommodatingly while secretly thinking you were nuts. But look at me now!

So, I’m curious, are there any types of garments that you’re more likely to wear if you’ve sewn them yourself? What makes your me made version better than the RTW offerings?

I’d Tap That

Friends, forgive me if you find the title of this post a little, er… crude. I’m not gonna lie, this joke has been in my head ever since Katy & Laney launched their sweet and sexy Tap Shorts pattern. Plus, I thought the occasion called for a little good humor. What occasion, you ask?

tap-shorts-oonapalooza-sewstylist-2.jpgYes!!! is what I exclaimed when I first caught wind of this brilliant Sewcialist plot. True, when writing about my core style a few months ago, I clearly defined my love of modern, easy wearing clothes in neutral tones. And I quote, “I’m not as into colorful clothing as I’d hoped I could be.” I truly did hope to be, as evidenced by my fabric purchases in the early days. But as I came around the learning curve I began to realize that what makes us fall in love with a fabric is not always what makes us fall in love with and wear a garment. So. That’s the long way of saying I’ve got a pretty colorful stash, and Oonapalooza time gave me a great excuse to dig in to it.

tap-shorts-oonapalooza-sewstylist-4.jpg

In an effort to give you my best Ebony x Oona, I pulled out my biggest shoes and paired them with my boldest earrings. I was hoping to put a few more prints in the mix, but my neutral toned closet left a bit to be desired on that front. I settled for some fun, furry texture instead. (But really, why don’t I have any fringe in my closet? Seriously, that has to change.) When it came time to get in front of the camera I did my best to break out of my rather serious posing standard and said to myself, “What would Oona do?” 

tap-shorts-oonapalooza-sewstylist-5

Sooo, less like this. (People don’t believe me when I confess to being a little shy, but honestly, this pic just about captures how I’m feeling most of the time. Especially with my legs hang’n out like that, sheesh!)

tap-shorts-oonapalooza-sewstylist-6.jpgMore like this! (Hey! Smiling is fun! Maybe I could get used to it…)

Now, let me tell you more about the make. I came by this fabric at a thrift store I used to frequent back when I lived in Eugene. I miss that thrift store something fierce because it always had the most amazing vintage fabrics for, like, a dollar. (Once I scored something like six yards of black silk noil for $4.99, but that’s a story for another day.) I had somewhere around a yard of this stuff, which proved to be just enough for the Tap Shorts. And, oh! The Tap Shorts! I really love this pattern. It provided the perfect classic, wearable outline to fill in with all this wild vintage color.

tap-shorts-oonapalooza-sewstylist-1.jpg

In true Oonabaloona fashion, I chose to forgo a muslin, and given that I just sewed these up blind I think the fit is pretty spectacular. I cut a straight size 6, which is actually one size down from the size recommended by my measurements. I’m learning that I tend to prefer a bit less ease in my garments than is usually drafted for.

I added about two inches to the length. Then I ended up trimming some of that off when it came time to hem. These shorts really looked shorter than I would imagine I’d want them to be until I put them on, and then I realized that K&L know what they’re doing with the high waist + short leg proportions and I should just go with it.

You can see from the rounded side seam in the pic above that I could maybe have left a bit more room for my behind. I also may have had a little snafu with sewing the waistband on upside down and trimming my back panel to fit before realizing I’d done wrong. However, since the shorts have some fullness in the leg I’m getting away with it. (And I’ve been getting away with it all my life, getting away with it…

tap-shorts-oonapalooza-sewstylist-8.jpgI made view B, which also accounts for the fortunate fullness, but you can hardly see the pleats because A: The fabric hides it. B: My butt is using it. The waistband fit perfectly though, and the slope from waist to widest point would be perfect if I’d made a small sway back adjustment, which is something I keep not doing even though I keep seeing that I kinda need to get with that. So next time I’ll probably grade up a size at the waist hip, and take a wedge out of the back, and all will be well with the world.

tap-shorts-oonapalooza-sewstylist-9

Never mind that little bit of fabric hanging out of the pocket there. Where’s the stylist when you need one?!

I chose to add the welt pockets as well because I can’t have enough pockets in my life. The directions for these, paired with the detailed online instructions, helped me produce the best looking welt pockets I’ve ever made. Honestly, they’re just about flawless. Of course, the fabric hides that too, but I see you, welt pockets, and I like what I’ve done with you.

I’ll end by saying that when it comes to both Oonapalooza and K&L’s Tap Shorts pattern there are too many beautiful things to link to. So if you haven’t Google stalked these yet, I’d best let you get to it!


tutorial // scout tee x complex geometries

Scout-pattern-hack-tutorial-sewstylist.wordpress.com

When I posted my knit Scout variation a few weeks back several of you asked for a tutorial showing how I modified the pattern. Since your wish is my command, here you have it! Jen and Wanett, among others, have shown that this pattern really doesn’t need any adjustments if all you want to do is make it up in a knit. The changes I made were to get a fun look of fuuuuuuuuuullness, and you’ll see that it’s totally easy.

If you’re new to playing around with and adjusting patterns to get a different look, adding fullness is a great place to start. It’s relatively foolproof, so long as you keep these two things in mind. 1: Balance your fullness. 2: Preserve your grainline. I’ll clarify both shortly, but figured it would be good to establish these guidelines at the outset.

What you’ll need:

  • A traced copy of your fitted Grainline Scout Tee pattern (fyi: since it’s easier to photograph, I’m using quarter-scale blocks here)
  • The usual pattern adjustment suspects: pencil, paper, ruler, scissors, & tape
  • A sense of adventure!

scout-tutorial-what-you-need-sewstylist.wordpress.com

How to:

The first adjustment I made to the pattern was adding length. I added some extra inches (maybe 4”?) to the sleeve. Jen has a great post showing how to lengthen your sleeves. I wanted the front of my shirt to fall about mid-pelvis and the back to cover my bum. I don’t remember exactly how many inches that turned out to be on me, but I think it was about +4” in front, and about +12” in back. But, as my boyfriend LeVar Burton would say, Don’t take my word for it! Try on a version of your Scout tee then take some measurements to see how much additional length is right for you. Or you might decide you don’t want to add any length. That’d be cute too.

As a side note, I’ll say that my shirt is definitely a little back heavy. That’s not a big deal, but I mention it because if you’re using a weighty fabric you might not want to go too crazy long in the back.

At this point your side seams won’t be matching up. It’s cool; we’ll come back to that.

scout-tutorial-pic2-sewstylist.wordpress.com

Now it’s time do some slashing and spreading! But first, those pointers I mentioned earlier… When you look at the source picture (see below) notice how the fabric drapes fairly evenly across the model’s bust? Instead of one big triangle of drape she’s got several little triangles distributed across the front of the garment. That tells me the drape is balanced. If it weren’t balanced I’d see one drape containing all the fullness, which would look kinda weird.

scout-tutorial-pic3-sewstylist.wordpress.com

To add balanced fullness to your pattern, draw a series of evenly spaced lines down the length of your pattern pieces, starting 2-3” out from center front/ center back. If you add just one line and do all the spreading from that one spot you’re likely to end up with one big triangle of fullness, which (as I said) might look kind of weird.

probably not…


scout-tutorial-pic5-sewstylist.wordpress.com

looking good!

Take your scissors and slash the pattern up to, but not through, the neck and shoulder seams. Leave the slashes hanging on by the tiniest little edge, creating a flexible hinge. (If we were being absolutely correct, we would actually have excluded the seam allowance and only slashed up to the seam line. Since I planned to make this shirt up in—always forgiving—jersey I took the easy route and skipped that part.)

Now you can spread open these slashes to create as much or as little fullness as you desire. In order to keep the fullness balanced, aim to spread evenly across all your slashes. And in order to maintain the grainline, spread your pattern pieces away from the center front/center back fold line, leaving the center front/ center back piece straight and on grain.

The picture below shows what NOT to do. Doing it like could move the straight of grain and lead to trouble.

scout-tutorial-pic6-sewstylist.wordpress.com

Add as much fullness as you like! I went as far as my fabric width would allow. If your fabric is narrow, you don’t have to cut your pieces on the fold. Just add seam allowance at center front and center back and you’re good to go.

Now, using your extra paper and tape, fill in all that lovely fullness you just created.

scout-tutorial-pic7-sewstylist.wordpress.com

All that’s left to do now is smoothing things out a bit around the edges. Your shoulder seam may have gone a little wonky when you spread, so take your ruler and smooth that out. Once you’ve done this to front and back you’ll want to confirm that the shoulder seam is the same length on both pattern pieces.

scout-tutorial-pic8-sewstlyist.wordpress.com

Smooth the hemline on your front pattern piece. I just sketched it in, but you can always use a curve if you prefer.

scout-tutorial-pic8-sewstylist.wordpress.com

Line up the side seam of your front pattern piece next to your back pattern piece, using the base of the armscye as a guide. That seam needs to be the same length on both sides, so mark where the front side seam ends on the back pattern piece.

scout-tutorial-pic9-sewstylist.wordpress.com

I ended up adding a bit more length to the back pattern piece so the shape of this sample more closely imitates the one I have on my full-size pattern.

Now you can sketch in the back hem, starting at the full length at center back and easing up to meet the proper side seam length. I tried to make my hem into a gently sloping quarter-circle.

At this point you may want to do a quick status check in the mirror and confirm that your length is still looking good. I pretty much just hold the paper pattern up, take a quick look, and say, Yep, look’n good, or make any little tweaks as needed.

Also take a moment to consider how you’re going to finish your hem and confirm that you’ve got enough seam allowance down there to make it happen. Once all is well, trim off any excess paper from both front and back pieces.

14515979540_946a2560fa_k

That’s it, my friends! See what I mean? Totally easy. Of course, if anything here doesn’t make sense you’ll let me know. It also bears mentioning that this is just one woman’s method. I’m sure there are other ways; this is what worked for me.

And now you’re free to go forth and make yourselves many twirly jersey Scout tees, and be sure to let me know if you do!


Sewcializing with Rachel Hill of Origamicustoms.com

This begins as a tale of sewing synchronicity. I was at the fabric store (getting a few yards of jersey cut, even though I just went in for a double needle­—you know, as you do), and the woman across the way was getting herself a yard of black neoprene. When asked what she had planned, I overheard her saying something about custom swimwear and a traveling sewing machine. Needless to say, I had to speak to this amazing gal. She introduced herself as Rachel and was kind enough to take me up on a cup of coffee and regale me with her tale of sewing radness. Today, I’m happy to share the highlights of our conversation with you!

Monokini-Swimsuit-sewstylist.wordpress.com

Here’s Rachel modeling one of the monokinis she produces for origamicustoms.com

So, tell us how you got started with sewing and swimwear design.

I grew up in Victoria, Canada, and my grandmother and my great aunt were both professional seamstresses, so it was always in the family. I was brought up sewing; from the time I was 6 I was learning on my mom’s machine. My sister, who is ten years older than me, she was sewing as well. All our Christmas presents for each other would be hand sewn.

Then in high school I’d go to thrift stores and buy wedding dresses, or grunge t-shirts, and rip them up or sew lace or leather bits on them because I wanted to be different and have something no one else had. And I did! Some of them worked out super well. Some of them I look back and I’m like, oh my God… But that’s where I started to first experiment with putting different fabrics together. My line has still got that element to it. I experiment a lot with putting together different materials, things that wouldn’t necessarily go to together.

Origamicustoms-Swimsuit-sewstylist.wordpress.com

And how did you get started with your swimwear line?

I’ve been living for about the last seven years in Central America, and lived for about five years in Honduras. I was a scuba instructor, which is how I got into sewing swimsuits. I moved there when I was eighteen, just after high school, and all my friends and I were in the water all the time.

It was this tiny island, only four to five thousand people living on it, and people couldn’t get things imported. Bathing suits were something that just wasn’t available. I mean, there were a few, but they were all small sizes. There was no variety, no quality. For bigger women, there was nothing they could wear. So I let people know I was experimenting with making things for myself and that I could try making things for them too. I would take trips back and forth to the mainland to get fabric. There was one ferry a day; a three hour boat ride. I never learned the techniques of stretch sewing until I started learning on my own, like how to put in elastic and use twin needles. I just Googled everything.

Recently, I’ve decided that I’m going to call Victoria home base again. The nice thing about running my business online is that I can be fairly flexible. Wherever I go, if I have a machine, or if I have someone else’s machine, I’m good.

origamicustoms-black-tan-swimsuit-sewstylist.wordpress.com

Let’s talk about that a bit more, because I think it’s so cool! I have to admit that when I first heard you talking about traveling with a sewing machine my mind was a little blown, because for me I feel that a huge part of sewing is having the space to do it in. You know, I feel like I need my space, I need my stuff…

I’ve always tried to live super simply. My thinking has been I need to be able to fit everything that I love into a backpack that I could throw on and travel with. Travel has always been super important to me.

When I design I just make the pattern from formulas, or my body, or someone else’s body. Mostly I just use math. You know, that takes up less space! I’ve worked on little, tiny plastic kitchen tables with one cruddy little machine. Now my company is growing to the point where I need to have industrial machines, and I need to have a studio to call home base. But I still need to be able to travel!

You have a machine you can travel with?

When I started out, I had a little machine I would travel with. I was working part-time in PR, so every time I would go on a business trip I would always pack my sewing machine. I’d work during the day and then at night I’d sew. It was just a dinky old Brother sewing machine. Nothing special, but it was all plastic, so it was light and I could take it with me on a plane. More recently, I was in San Jose [Costa Rica] for a while and set up a home base, including a Janome serger. At that point I figured if I traveled I could pick up a whatever sewing machine on Craigslist for less than a hundred bucks, but the serger was something I needed to take with me. I’d carry it on the plane with me. It’s pretty heavy, but I’d lug this serger around with me.

I love that! That’s real passion.

It totally was.

You were doing this even before you launched your business?

Yeah, when I was just sewing for me, and for friends, I would always take my sewing machine. That’s what I wanted to do at the end of a workday, to relax or whatever. It really worked at the time; I was just doing it part-time and I would get these fun little orders to do. I’m still able to do [some work on the go]. The fabric you saw me buying the other day was for a present to give to my friend for letting me stay with her.

orimagamicustoms-corset-swimsuit-sewstylist.wordpress.com

So you would take a machine. What else would you take with you?

Oh yes, my travel kit! I had a bobbin saver, my pincushion, my rotary cutter and a mat. I’d put all my patterns into these big manila envelopes and pack those too. It was so messy and terrible, but it would fit in my suitcase. I never got one of those big cutting mats. I just got little ones and taped them together so I could fold them up like an accordion.

Oh, okay! I was thinking, How the heck did she take the mat?

Yep, I had three little cutting mats all taped together on the back. I would take that with me, and a pack of needles. I didn’t even bring thread because that’s something I could always buy easily. And… my stitch ripper. Really, not much else!

origamicustoms-black-fringe-swimsuit-sewstylist.wordpress.com

You set yourself up in this way where you were forced to go out into the world and find your community.

That’s very true. I did like that because it was a way to get connected to a lot of people. You know, the people at the fabric store would get to know me as the only English speaker. I was just starting to learn Spanish, and I’d go in and didn’t know the names of any of the fabrics. But once we started to form a relationship they were really great about letting me know what was going on, or if there was a new store I should go check out. But I’m also pretty much an introvert, you know? At the end of the day, I do like to just go home and sew.

I’m so impressed by what you did because I can get overwhelmed in fabric stores, especially in the notions department, even when everything is in my native language!

Every time I come up to North America I have this problem, coming from having just one of everything, just enough, and having to reuse things. I used to have to put bobbin thread on top of bobbin thread, eight colors on one spool! And then I come here and I can get all this stuff, and it’s cheap. I have to ask myself, Do I need all of this stuff? Do I need a magnetic pin holder? Twelve different rulers? It’s really tough for me, to try and just stick with what I know. But my new studio, there’s very little stuff. It’s pretty much bare minimum, and I like that.

origamicustoms-black-bikini-swimsuit-sewstylist.wordpress.com

Tell us more about your business!

I’ve been doing the business fulltime for the last year and a half. Before that I always had other jobs, but then I got to the point where I was like, “Actually, I can do this as a career, and I’m not gonna go broke!” That was super exciting.

It’s still really new, but I’m feeling pretty good about it. I did a lot of work over this last year upgrading my website to make sure everything is really simple, easy to use, and clear. I’ve been working with a little company in Ithaca, New York, doing consignment sales, and I just got my first big wholesale order. To do a whole batch of something is totally different because everything else I do is one-of-a-kind. People send me their measurements and I hand-pattern for each person to make a piece just for them. I do custom designs too, with people sending me an idea or concept they want me to work up. That’s totally the fun stuff for me.

That’s a great concept. Especially with things like lingerie and swimwear, when so much of our sense of ourselves and how we feel about being in our bodies is impacted by how we look in these garments.

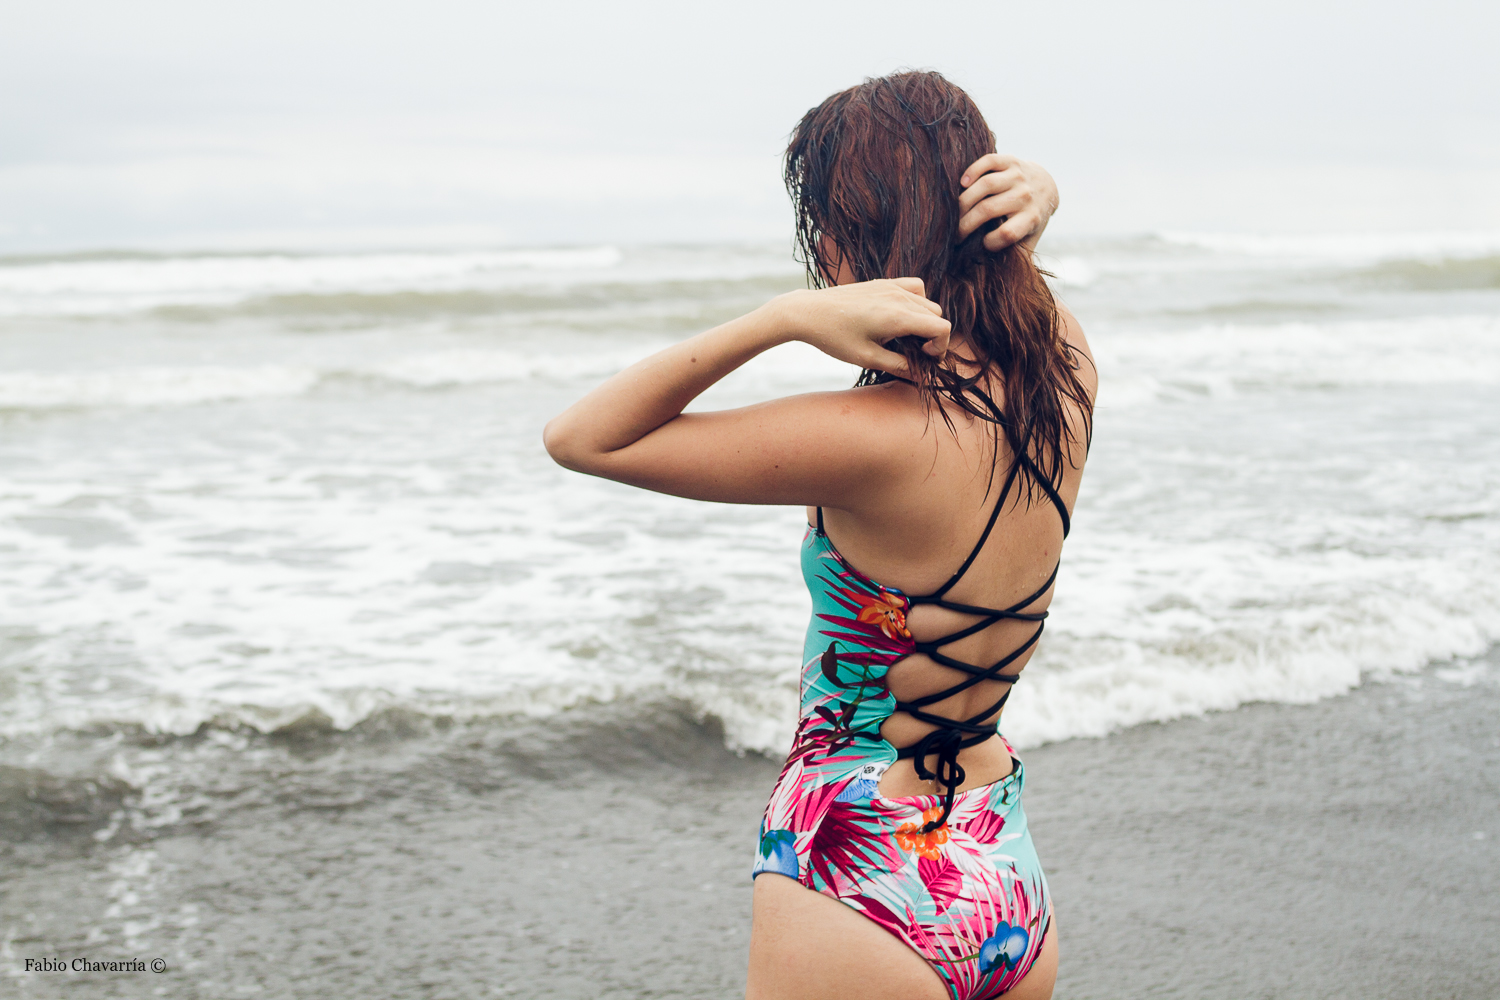
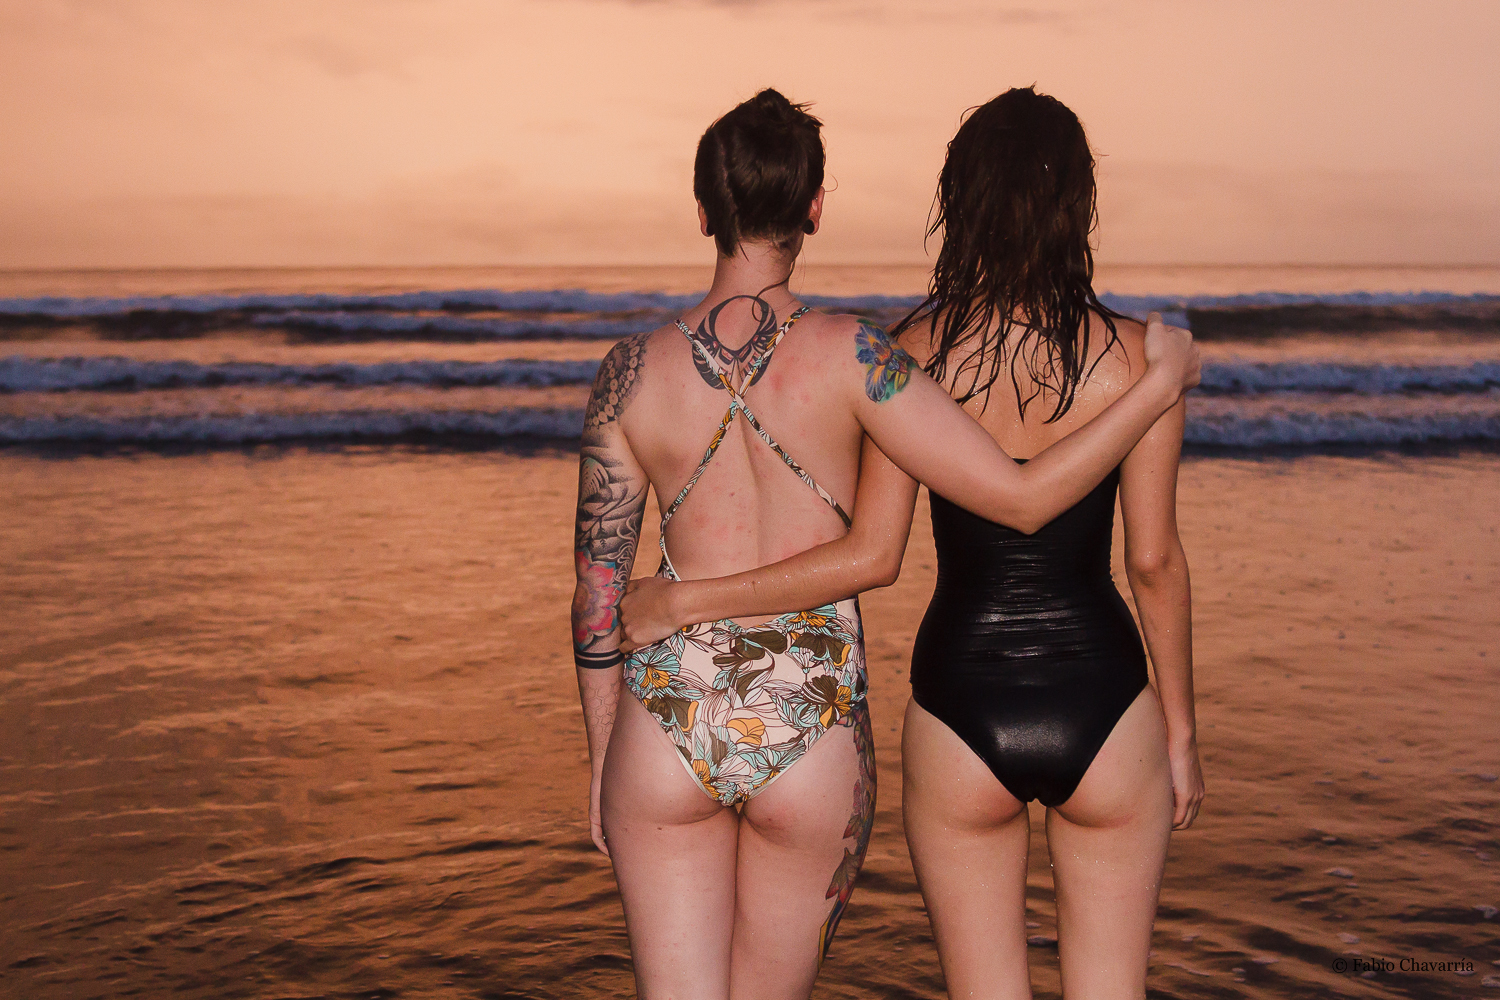
I work a lot with the queer community and customers whose bodies don’t necessarily conform to the established standards of mainstream swimwear companies. It’s something I’m really passionate about because there are so many people out there that can’t find what they want and need. Sometimes people will come to me and say, “I need to hide this part of my body,” or “I need to emphasize this.” They may come with a list of restrictions or needs that are going to make the design process more challenging than just, you know, making a pretty bikini so I can sell a billion things. I’d much rather make something that’s going to work with that person for what their needs are.

origamicustoms-purple-unitard-sewstylist.wordpress.com

It sounds like your ethics and what you want your life to look like have been just as important when forming your career as your passion for sewing has been.

Yes, that’s so much a part of my brand. At this point, I can’t really separate myself, my life, from the brand. I just switched over from using cottons to using bamboo. The quality of these fabrics is so much better, but I researched it and also found it to be more ethical. It uses less water, plus it’s more sustainable and renewable. This is what I would want from anything I would buy for myself. I realized I need to be offering something that feels really good ethically as well as on your body.

My ethics have been so strongly appreciated by my customers as well. A lot of shops charge more for bigger sizes because that uses more material. But I’ve said I will never do that. There’s no cap on the sizes that I offer. I offer between an xxs and a 5xl, but people can send me literally any measurements and it’s no more expensive. I feel really strongly about all people being able to find swimwear and undergarments that are good for their bodies. I feel really good about being able to offer that to people, to make that an accessible, safe, comfortable experience.

With your business taking off, do still have time to sew for yourself?

It’s something that I’m making more of a focus now. What I’ll often do, when I’m developing new ideas for a line, I’ll make a prototype of my idea for myself and wear it around, see how it feels, how well it holds up when I’m doing yoga or whatever. Sometimes they turn into something that I’ll offer, and sometimes they don’t. But either way I’ve made something for myself.

origamicustoms-black-tanktop-sewstylist.wordpress.com

What, if any, ways do you find yourself engaging with the larger sewing community?

I’m newly back in Canada, so I’m just starting to branch out and go to places where crafts people are going to be, like craft fairs, flea markets, or even garage sales. I’ve found that there’s a lot of overlap with handmade and vintage too, so talking to little shop owners can be a great way to connect with makers. I’ve met people at parties and we’ve bonded over sewing. I do tend to talk about sewing a lot because it’s such a huge part of my life, and this is what I love. When I’m making new friends, I definitely want to make sure they’re the type of people who are into that. I’ve been around people before who don’t see it as a legitimate job, and that’s been really tough and frustrating.

It’s very much a movement here, whereas where I was in the third world it’s not. Sewing is seen as “something my grandma does,” or “only poor people sew because they need to in order to have clothes.” This movement of crafters, that hasn’t caught on. People are very negative when talking about crafting, because the thinking is if you’re crafting it’s because you can’t afford to buy new clothes. And so there wasn’t any excitement, there wasn’t any reason why you would want to do that. It was very much looked down upon.

That is really interesting, that connection between economic prosperity and crafting. Of course, now that I hear you say it, it seems so obvious that there is a luxury to crafting for pleasure, as a hobby, rather than out of necessity.

Yes, my friends [in Central America], they would probably be embarrassed to talk about the fact that they had handmade clothes. Because it would seem like, “My parents had to make me these clothes because they couldn’t afford to buy me new ones.” So for me, saying this is something I do for a living, the response is, “Why would you want to do something like that?” And there’s not that feeling that you want to pay more for handmade clothes, because the value is lower. The attitude is, “Well, it’s just handmade. If I can have a brand name sweater, why would I get one handmade?”

Here, the value of the work and the time that goes into something that’s handcrafted is much more understood. And I also think people here see that if they’re supporting a crafts person, there’s a very good chance that they’re supporting their community, and putting money back into their local economy. That was a motivating factor for my move back to Canada. I wanted to be part of that community, and be where people value my work.

origamicustoms-black-floral-swimsuit-sewstylist.wordpress.com

What are the best things that your skills, experience, and passion for sewing have brought to your life?

Well, the main thing for me is being able to be self-sustaining. To be able to not just craft for fun. That people want to pay me money for my skills, that’s huge. It still blows my mind: People want to pay me money for stuff I make! I’m still new at this, and I’m a terrible self-critic and really hard on my work. So just that fact that my business is self sustaining, that I don’t have to take another job… It just blows my mind everyday.

…..

I hope you enjoyed learning that little bit about Rachel and the inspiring work she does as much as I did! I find it wonderfully inspiring to hear from other passionate seamstresses and to learn something about the unique ways people have for incorporating sewing into a lifestyle and, as in Rachel’s case, sometimes even a living. I was also really intrigued by her perspective on the attitudes toward sewing and handcrafting in different parts of the world.

Do you take your sewing with you when you travel, as Rachel does? What ways have you found of engaging with other sewcialists and keeping your crafty passions alive when you’re on the road?