tutorial // fabric covered buttons

fabric covered button tutorial.collage.jpg

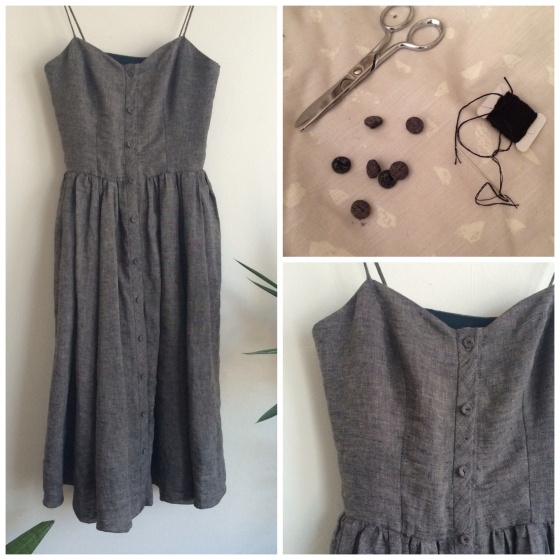
fabric covered buttons added a nice, high-quality touch to my simple sundress

One of the best things about sewing your own clothes is having the opportunity to add the special details that make a garment uniquely yours. Fabric covered buttons are a simple, easy way to add interest and detail to your garment. Covering your buttons is a great way to upgrade less than stellar buttons from your stash or to save yourself the work of hunting high and low for the perfect match to your project. This method for covering buttons is easier, less expensive, and more delicate than most of the covered button kits on the market.

let's get these naked little buttons covered!

let’s get these naked little buttons covered!

What you’ll need:

  • Find yourself some buttons with two or four holes, not shanked.
  • The best fabric for this application will be weighty enough to withstand some manipulation and tugging but lightweight enough to wrap snuggly around the button, and it won’t easily fray. Here, I used a linen blend. You won’t need more than a tiny scrap of fabric.
  • You’ll also need a needle, thread to match your covering fabric, scissors, and some fray check.

fabric covered button turorial.cutting fabric rounds collage

How to:

  • Trace and cut a round of fabric that’s about twice the circumference of your button. Here I used a quarter as a template for my 1/2 inch button.
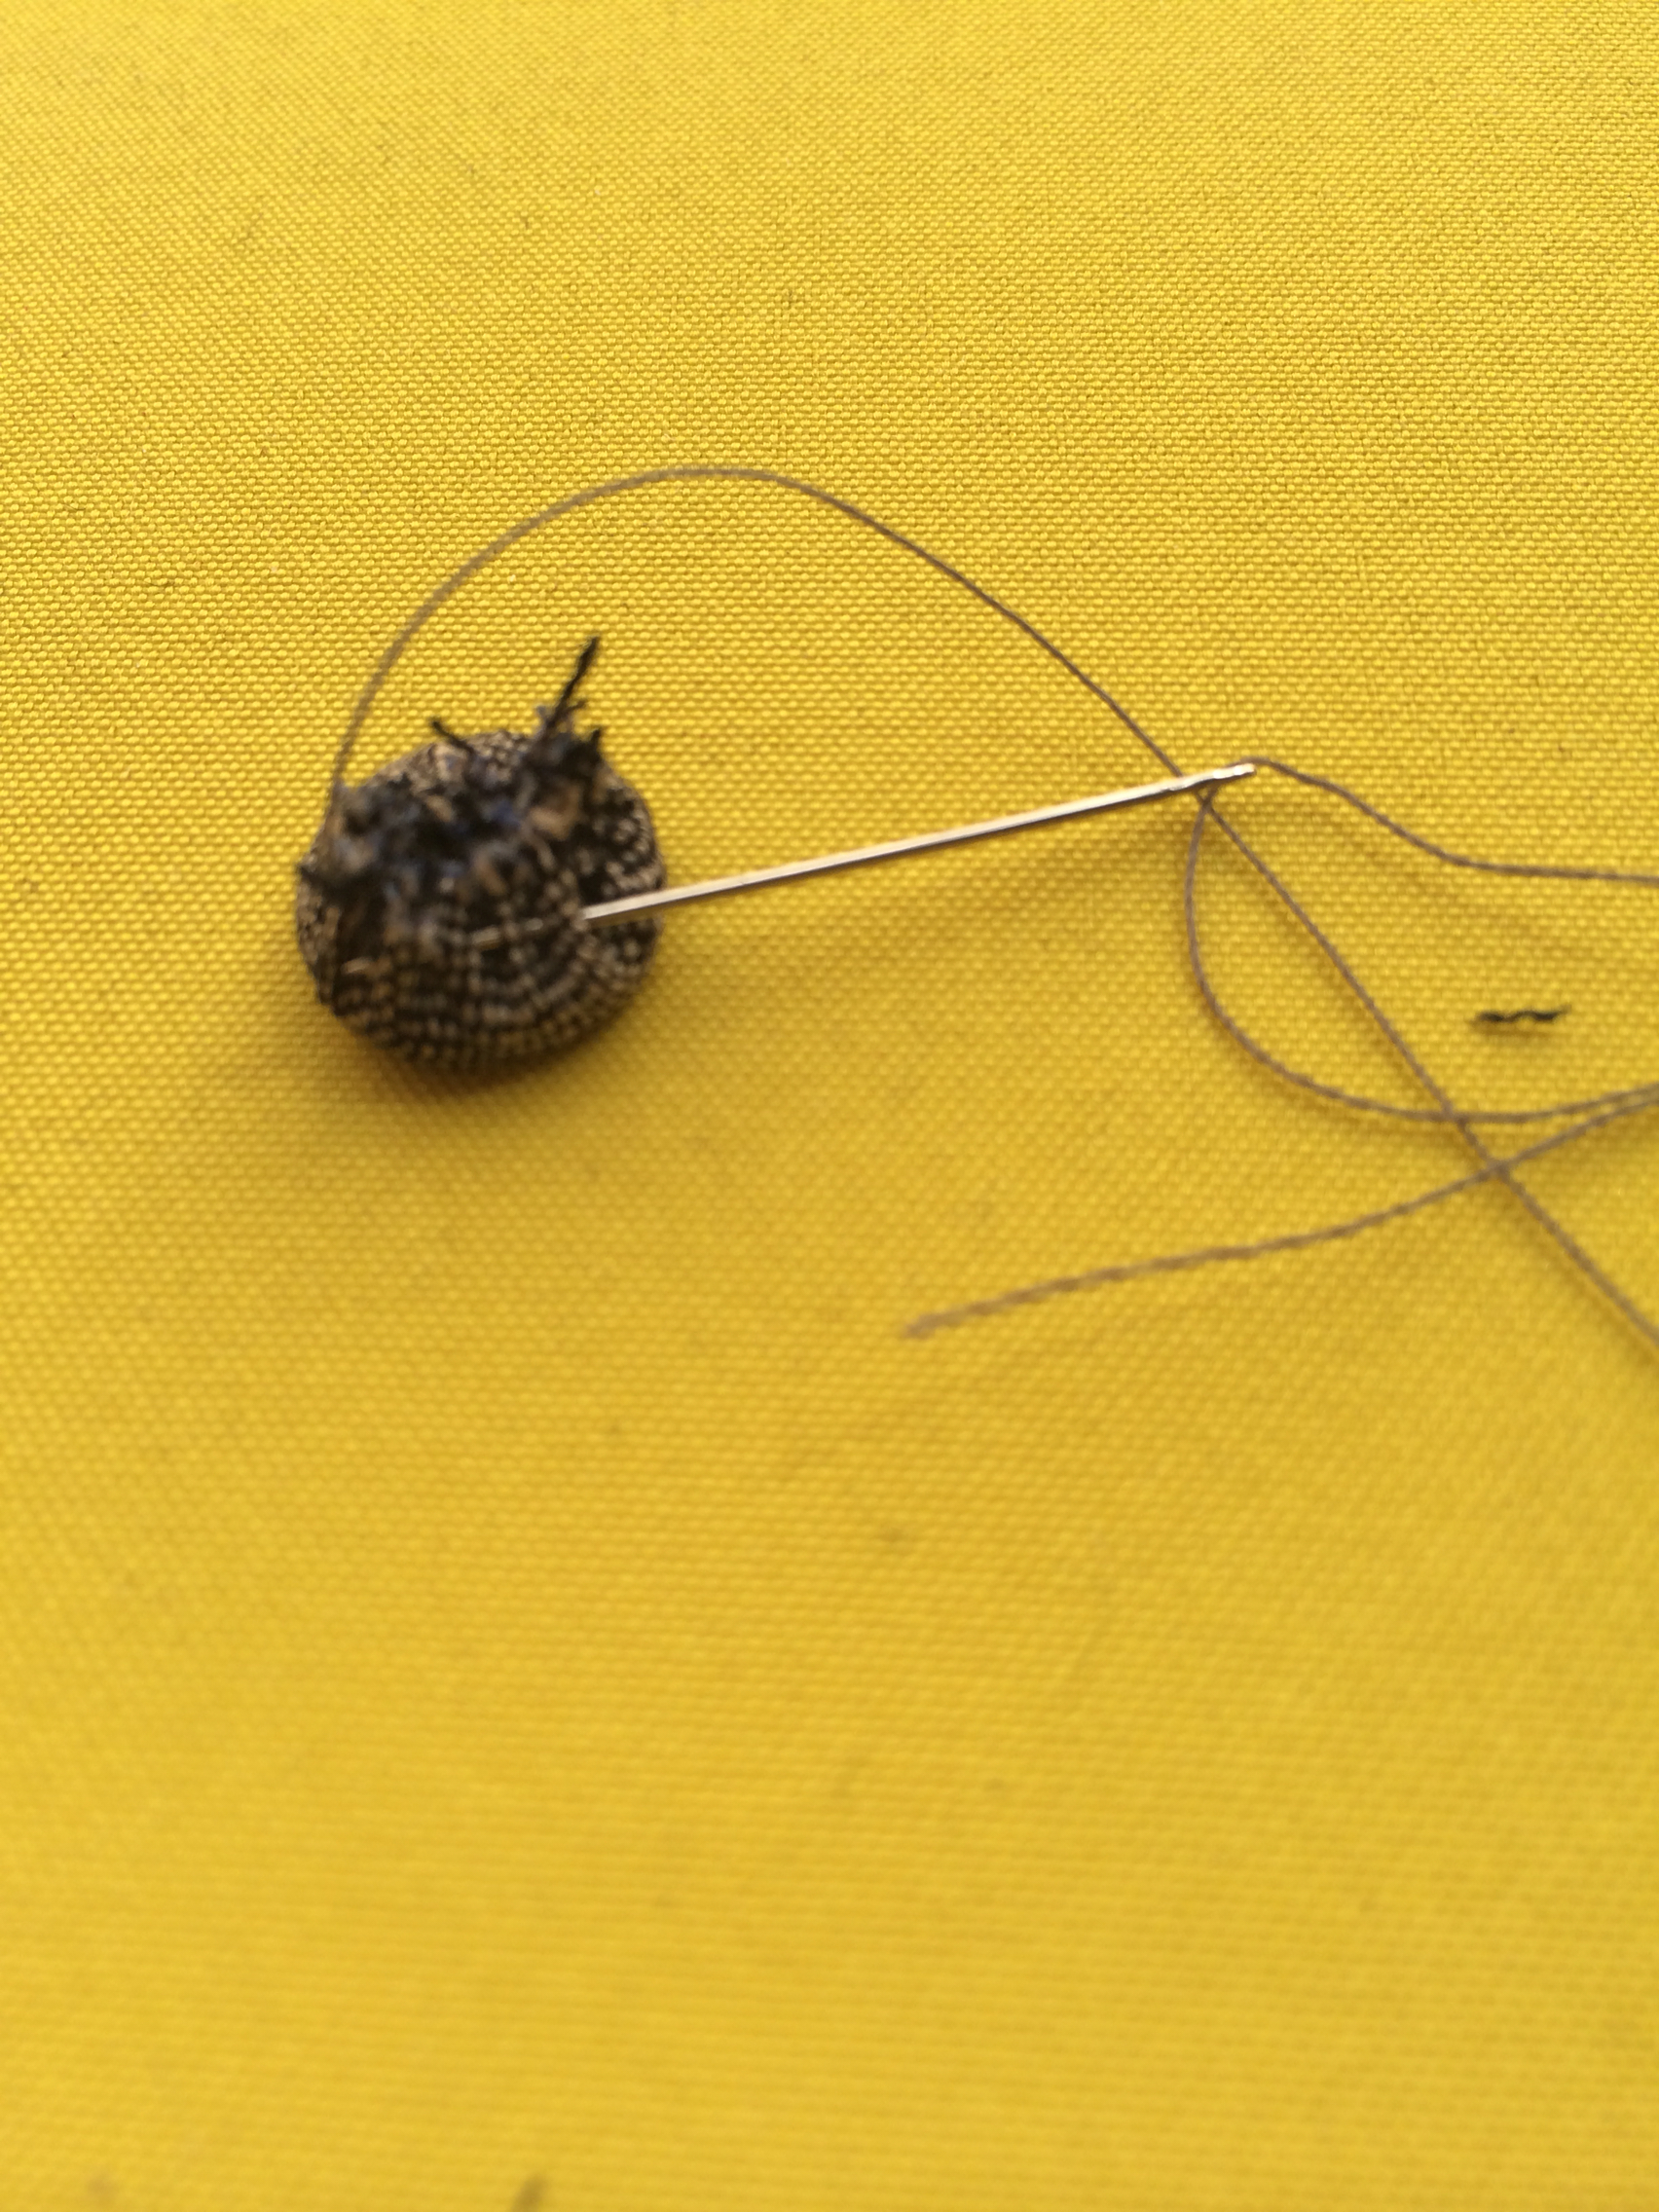
  • Leaving about 1/8 inch seam allowance, sew a running stitch around the edge of the fabric round. You might want to secure your thread with a backstitch as you begin; a knot alone may not be secure enough to hold.

fabric covered button tutorial.stitch around the edge.jpg

  • Don’t knot off your thread once you’ve stitched all the way around. Instead, start tugging the thread and gather the round into a cupped shape. I used the tip of my thumb to begin easing the fabric into position. (Try to keep your needled threaded during this step.)
  • As the fabric begins to cup, drop your button in (see below). If your button has a front and back, place the button with the front facing down against the fabric. Use your finger to keep it centered as you pull the thread, tightening the fabric around your button.

fabric covered button tutorial.cupped fabric.jpg

  • Take a few stitches around the little folds of fabric at the back of your button, reinforcing the gathers you just made.
  • I also like to pass the thread beneath the entire mound of folds once or twice before knotting off.

fabric covered button tutorial.stitch the folds

  • Knot and trim your thread. You may also want to trim down the fabric gathered at the back of your button. It’s cool to trim off any stray threads, but be careful not to snip through the securing stitches you’ve just made.
  • Drop a little fray check over the whole business for extra security. Buttons can take a lot of wear and handling over the lifetime of a garment, and this helps ensure our covers are secure enough to last.
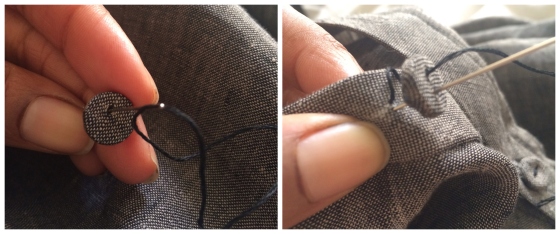
  • That’s it! Look at that sweet little button!

fabric covered button tutorial.fray check

  • When attaching your buttons, check with a needle first to find out where your buttonholes are. I like to wiggle my needle around to open up the weave a bit and clearly mark the openings.
  • I used 3 plys of embroidery thread to attach my buttons. I made two passes through the fabric + button, then I wrapped the thread twice to make a shank before knotting off.

covered button tutorial.attaching buttons.jpg

  • I took the simple route and used self fabric for my buttons, but think of all the fun ways you could use this application! It could be cute to use a bit of your lining fabric to make a co-ordinated button. You could also use the wrong side of your self fabric to create a similar but different look for your buttons. Or imagine if you used a vintage silk scarf or repurposed the fabric from a stylish old tie?
  • It might also be a nice touch to tack your buttons down with French knots, instead of just a simple strand of thread.
  • Finally, you might want to make a spare button or two while you’re at it. It would be sad if, sometime in the future, you lost one of your couture buttons and no longer had access to the fabric you used to cover it.

fabric covered button tutorial.finished button!

I hope you’ve found this helpful, and please do let me know in the comments if you have any questions!

So, what do you think? Do these covered buttons look like something you might try on an upcoming project?

my ideal dress

my ideal dress//sewstylist.wordpress.com

It’s been a strange year in San Francisco. The glorious, warm, summery weather we typically expect to get no more than 2-3 weeks of down here Has Not Quit. Did I mention it’s been glorious? Glorious! Okay, I’ll calm down. But seriously, my closet was not prepared for all this (glorious!) sunshine. The heat would strike and I’d feel the need for a comfortable, easy to wear dress that was as feminine as it was sexy. Was I thinking I’d find the answer to my sartorial dreams in a vintage patten with a cover art model that looks like an extra out of a John Hughes film? Hmmm, nope. Can’t say that I was. Bad cover art be damned; when you make this dress up in something less visually arresting than peach+blue+yellow+plaid it kinda starts looking like a garment that would be equally at home on Audrey Hepburn or Bridgette Bardot. Right?

my ideal dress//sewstylist.wordpress.com

I came by Simplicity 7506 (circa 1986) when a member of my most excellent local sewing club brought a huge box of vintage patterns to giveaway at our last meet-up. I did have a moment of worrying over getting greedy around the free-vintage-pattern-awesomeness; fortunately the moment was brief. I’m not sure I realized when I nabbed this pattern that it was my dream dress. But The more I considered the elements of this dress—the full tea-length skirt, the princess seamed bodice, the button front, the pockets!—the more I started to feel the need to push all other sewing plans aside and proceed with making up this dress pronto. Friends, I’m so glad I did, because today was another glorious San Francisco summer day!

14475987493_3eb40a26e9_o

The lovely fullness of this skirt made it easy to chill at the park without worrying about showing my lady bits, and since I made it up in an easy wearing grey/black linen blend (that has been languishing in my stash for at least a year) I could be totally casual about sitting on the lawn, noshing on a sandwich. This turned out to be the perfect fabric choice for this dress. The linen has the body to hold up the fitted bodice, but still enough easy, breezy goodness to hang loose at the skirt.

14452472481_01d6eb7f25_o

I lined the bodice with a light weight rayon twill I had leftover from another project. This not only feels great against my skin, it also provides the opaqueness I needed up top. In other finishing news, I pinked all the seams because I really love the vintage look this gives and also because it’s a light weight, flexible way to finish a seam, which made it a good treatment for this light, flowing skirt.

14269221480_4684e75ef0_o

I used my rolled hem foot to finish the hem. Now I’ve gotta tell you, I’ve never had a rolled hem turn out this good! I’m not sure if the difference was me or the fabric… I’m thinking it was the fabric as usually I try to use that foot on silk, and the whole endeavor makes me want to cry. Things went so well this time I’m inspired to try using that little foot more often.

14454481452_45bd3fed74_oSpeaking of developing new skills, this dress marks the first time I’ve made spaghetti straps and that’s also my first button placket! I used Jen @ Grainline Studio’s method for turning the straps, as witnessed on her Instagram feed. Getting those suckers started was tough going, but once you’ve got that first inch or so turned the rest is a breeze. As for the button placket, I stuck pretty closely to the pattern instructions. Only change was stitching in the ditch to get the backside tacked down instead of doing that by hand. I did tack the lining down by hand, but it seemed like the placket should be as sturdy as possible. It came out looking clean, so I’m happy.
14269545089_7aa4c36469_oYou can also see in this pic that I made my own fabric covered buttons to match the dress. I got a bag of about a hundred little buttons at the thrift store, and covering them was a good way to uh, raise their profile a bit. They were fun to make and add a special, handcrafted touch to the dress, I think. Once I had the dress on I saw that buttons alone do not a fully closed dress make… Er, which is to say there was some major gappage happening in the in-between areas. If I make this dress again (and right now I’m thinking there’s a good chance I will do) I’ll probably add just a wee bit more ease into the bodice, which may or may not help with the gappage. But for this round I added the hook + bars you see above & problem solved!

14454456372_5864789c92_oYou know how sometimes you try on something you made for the first time and can’t help but let out a little squeal of joy? This was totally one of those times. I’m in love with this dress, you guys! My closet finally has the perfect dress for strolling, park sitting, barbecuing and cocktail sipping so long as SF wants to keep all this glorious weather coming!

i made this: Simple Silk Shirt

The other night I was toiling away in our sewing room, when my housemate paused outside the open door to say, “Oh, are you sewing?” To which I groaned in reply. Actually groaned, like, “Uugggh.” May have also rolled my eyes. I was in a state because the answer to Housemate’s innocent question was no, I was not sewing. Instead I was re-working, for the umpteenth time, a pattern that I really, really wanted to be sewing. But instead I had put a stupid amount of work into tweaking the pattern, this way and that; I was basically redrafting the thing!

Housemate tried again: “So…you’re working on your coat?”

“Sort of.”

“Okay, cool.”

But it was not cool, which is why I said, “Well. There’s not much joy in it at this point.”

Sure, after reading today on Lauren’s blog that she worked through SIX muslins in order to complete her latest make, I feel like a baby admitting I was pouty after only 2.5 muslins, but I totally was. When this convo with Housemate caused me to realize I was no longer having fun with it, I officially put that project aside. Then I needed a brief time out. But before the day was out I returned to the sewing room. (How lucky am I to have a sewing room?! So lucky.) There I launched a fun project to counteract some of the ill-effects of that  boo-boo pattern that I’ll probably not be using. Like, ever.

photo 11This project was super fun to make! Let me tell you why. First off, it took me the length of Howl, the movie, plus 1/2 of Iron Lady (I ❤ Meryl), to prep my fabric for cutting, cut it, French seam the shoulders & side seams, then press & pin the neckline and sleeve hems in preparation for hand sewing. And then there was hand sewing! SILK! That was fun. All told, the Simple Shirt came together in something like four hours.

photo 22The fabric is some that I’ve been hoarding for over a year now. I purchased it on a trip to San Francisco, back when I was living in Oregon. As I am now living in San Francisco, it seemed high time I take the lovely silk out of hiding and figure a way to get it on my body. The fabric is the most lovely dusty-greyish-mauvey color, and I washed it to take down some of the shine, which brought out a more crepey texture in the fabric.

photo 1The pattern was drafted using the rub-off technique on a favorite shirt from my closet. Lots of sewist around the blogosphere have been talking about their desire to sew more wearable clothes, and I think copying the clothes you know you love to wear is a great way to achieve this. I read about the basic procedure in Steffani Lincecum’s book, Patternmaking for a Perfect Fit. Craftsy also has a couple courses on the subject. There’s a few different methods you might use to get the basic information from your garment onto paper. Once you have that, you need to know some drafting basics to get you from tracing to pattern. It’s a fairly straight forward process, at least with something as simple as this shirt! I’m excited to try again with something a bit more complex. This original garment was purchased at a fast-fashion shop and made of a totally decent rayon. Needless to say, silk > rayon.

photo 4Here’s me basking in the joy of being swathed in silk…. I’ve got the shirt layered over a silk tank dress I bought some years ago. It’s super cosy, but a little more revealing up top than is ideal on the average day. Layering my new shirt over it was just the thing! You know you’ve made a good addition to your closet when the new item is not only wearable in and of itself, but also makes the things you already own more wearable!

photo 5         photo 3

And finally, there’s this: I had a bit of a camera malfunction when I went out shooting. As a result, I ended up shooting video. So I took the opportunity to mess around with iMovie and came up with this clip below. It’s dorky, and I won’t be winning any Oscars for my editing skills! But I made it and figure there’s no harm in sharing. If nothing else, it does a great job communicating just how glorious silk can be!

Have you ever sewn with silk? This was my first time, and now I can’t wait to try again!